Controlling a ventilation system via HomeKit
I'm a software developer. Working on web applications is my passion. But I like to learn things and a few months ago I got inspired by my colleague Ruud to dive into hardware. After some brainstorming I found a nice first project to try. This is a brain dump of what I did and my learnings – I hope they inspire someone else.
Ventilation
In our house, there is a ventilation system, an Itho CVE ECO RFT to be precise. Almost every room has a ventilation vent that looks like this:
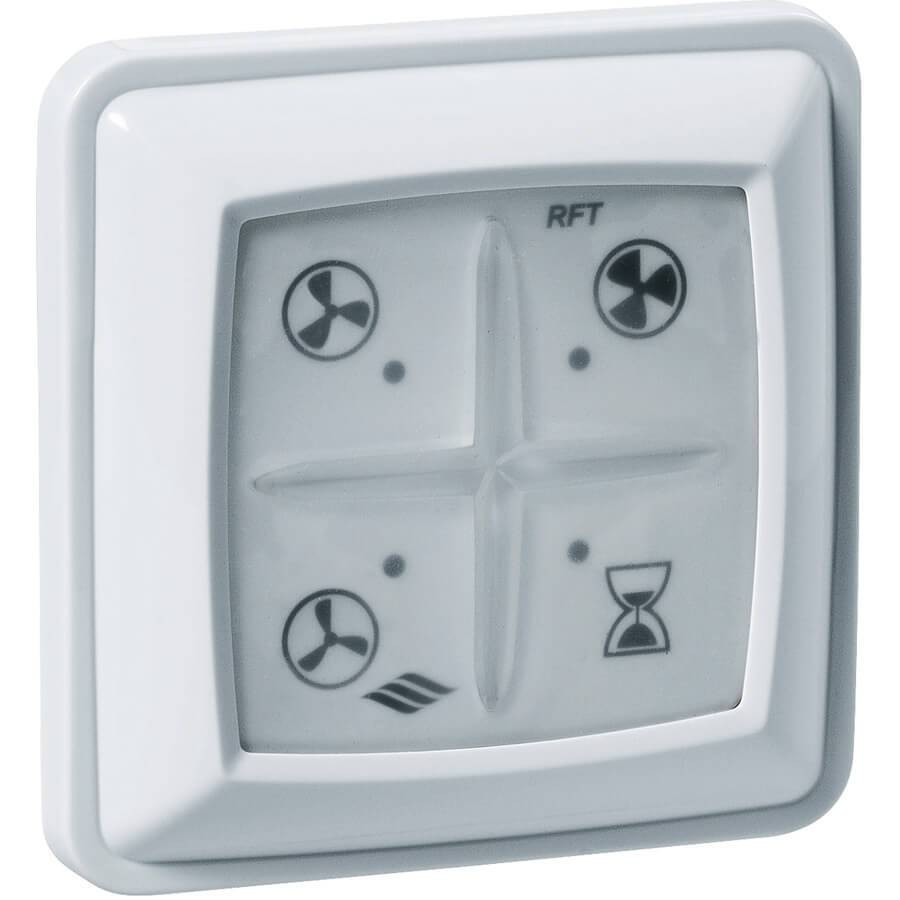
We have 1 remote control in our bathroom to set different ventilation speeds or a 10 min timer. All vents are regulated centrally, you can't set the speed for each vent. It looks like this:
I found it a bit annoying to walk to the bathroom when I'm laying in bed and notice that I forgot to turn the ventilation to a lower speed. Not really a huge deal of course, but I found this could be better and a nice project to experiment on. The goal was to use my phone to set the ventilation speed by integrating the ventilation with HomeKit:
Remote Control
The remote for the Itho CVE ECO RFT cost around 50-60 euro, which I found quite steep. I first thought I had to buy one and reverse engineer it. But I had the incredible luck that an awesome engineer already reverse-engineered the remote control. The biggest part of this whole project was already done! All that was left was to get hardware and integrate with HomeKit.
Hardware
The place where I bought the hardware is AliExpress. It felt a bit shady to buy there because the prices were low and there were no shipping costs. It worked out great though. I considered the environmental impact of buying in China. Most products are shipped from China, and except the price, there is not a difference to buying it in Europe – so I went with it. Bring some patience, it takes a few weeks until you get your parts. Unfortunately, I didn't receive some parts as well.
Breadboard with jumper wires
For hoppy projects like this, you want a solderless breadboard. It's called breadboard because in the early days, people nailed copper wires in wooden boards to create electrical circuits – sometimes boards that were actually used to slice bread on. Solderless means you don't have to deal with soldering. You just need to put the jumper cables into the right holes, and you're done.A bread board often has numbers and letters on them. They can be used to rebuild electrical circuits from others. The holes are connected in a certain way. Read this great overview to learn how the holes are connected.
CC1101
Chip manufacturers like to use acronyms and numbers to identify their products. A CC1101 is a radio transceiver, and it's needed to emulate the Itho CVE ECO RFT remote control. This means this chip can send and receive information via radio signals. It's actually quite amazing how this works – in those chips are crystals that vibrate to create a certain electric frequency. This chip sends and receives on the 868 Mhz band, which the Itho uses.ESP8266
To control the CC1101 chip, you need a microcontroller. The ESP8266 is cheaper than Arduinos and comes with a wifi-module, which is perfect to combing with Homekit. The Arduino IDE can be used to program this microcontroller in C/C++.
How to get it running
1) Connect all the hardware
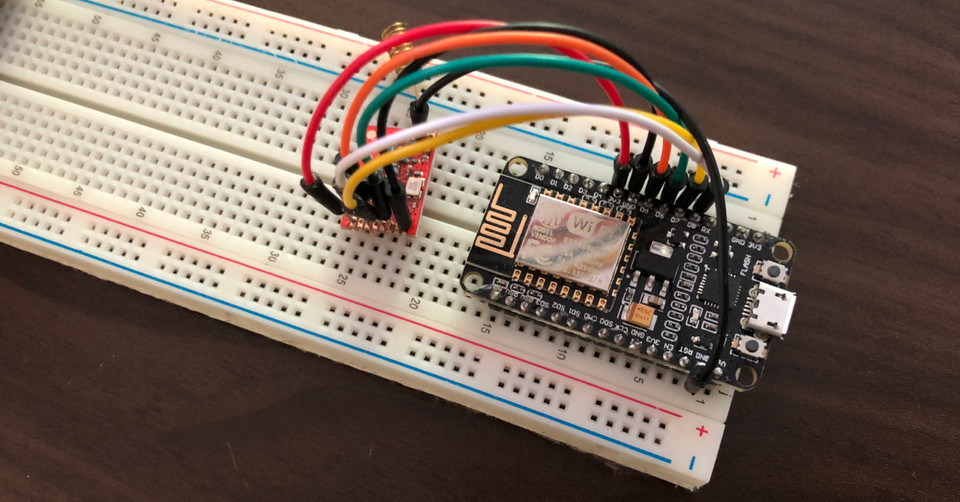
This is the end result. You can also see a table of the connections. For the power supply I connected the ESP8266 via USB to a Mac mini.
2) ESP8266 with REST interface
To get started with programming the ESP, I recommend the following steps:
I was lucky to be able to reuse a lot of code. All I added was a REST interface and connect to a local wifi. You can use the code from my fork. To connect the ESP to your wifi network, add the wifi credentials in IthoEcoFanRFT.ino. To get the code running on the ESP, open the IthoEcoFanRFT.ino file in the Arduino IDE and upload it like explained in this video. You should see an IP popping up in the serial monitor. Test that it works by opening http://[ip]/ in a browser. The ventilation doesn't react yet, it needs to be paired with the new remote.
3) Pair the ESP as a remote
- Plug out the Itho CVE ECO RFT ventilation unit
- Wait at least 15 seconds
- Plug in the ventilation unit
- Upload the code from the previous step within 2 minutes
Test that it works by opening http://[ip]/press?button=high and http://[ip]/press?button=low in a browser. You should hear the ventilation picking up speed and slowing down again.
4) HomeKit support
I wrote a Homebridge plugin to control the ESP. Homebridge emulates the iOS HomeKit API and is written in NodeJS. You can use the IP from the last step in the installation step described here. The challenge here was to map the actions coming from HomeKit to signals going to the remote. I ended up using a state machine which worked great.
There is now also esp-homekit, an option to emulate the HomeKit API directly on the ESP, which I didn't try yet.
Learnings
Doing things with hardware is much more accessible than I thought. A wealth of information and libraries are available online. It's fun for once to program something that is a bit more real than just software. I also learned that the hardware doesn't cost much. A few Euro spent on a microcontroller already open up so many possibilities. There is a nice TED talk showing examples of creative ideas that come to life using microcontrollers.
Are you building something cool? Let me know in the comments :)


